A version of this article appeared on DPReview.
Bold sunrises. Moody clouds. Radiant sunstars.
These elements often come to mind when we think about landscape photography. And for many years, they’re what I chased trip after trip.
But I’ve found that coveting and waiting for glorious skies vastly limits the type of landscape photos we can capture. Expectations stifle our creativity and lead to disappointment when the conditions fall short or fizzle out.
Landscape photography can be (and is) so much more than golden rays and brilliant colours. It’s about capturing the essence of an environment and immortalising defining details in the landscape.
So what if you simply excluded the sky altogether?
With a cloud-free sunrise, I focussed on this telephoto detail of glowing wave sea spray at the typically wide-angle friendly Bombo Headland.
While I still chase bold skies when they occur—they’re worth capturing for a reason—I no longer let the state of the sky dictate my photography outings.
In fact, smaller scenes have formed some of my most striking compositions. Compared to sweeping vistas at scenic lookouts, these more intimate moments are less likely to be replicated by other photographers.
So here are six tips to help you expand your creativity with fresh compositions and make the sky no longer the limit.
1. Follow the periphery of your perception
This first tip may seem a bit pretentious. But it’s a crucial place to begin.
I recently read a passage from Peter Dombrovskis (a famed Australian photographer from the 1980s) that crystallised this concept for me:
My most productive days are when I move through the landscape with an attitude of acceptance—of leaving myself open to all possibilities rather than expecting to find anything in particular.
I look ahead to guide my feet over rocks and roots, but images are more likely to insinuate themselves from the edges of my view, the periphery of my perception.
The takeaway for your photography? When you remove preconceived ideas that anchor your creativity, you’ll begin to appreciate the smaller scenes around you. You’ll notice quieter moments beyond the epic seascapes, grand vistas and verdant forests.
Your eye may catch intriguing shapes, contrasting colours or patches of light. And when you do, you’ve already gifted yourself the attention and mental space to follow that thread of interest further. You might move closer, shift angles or return later under different light.
So rather than entering environments hoping for ‘ideal’ conditions, I now (try to) enter each environment with an open mind. I allow myself the freedom to wander. To entertain the potential of smaller scenes that I would have otherwise ignored and overlooked.
Slow down and take notice of underfoot scenes, such as these confetti-like myrtle beech leaves at Cradle Mountain
2. Simplify the scene and fill the frame
An open sky often serves as a largely clean, distraction-free compositional element. So when you don’t include one, you may be looking down or across at environments overflowing with complexity.
Herein lies a central challenge of intimate landscapes. Chaotic elements, like messy foliage or incongruent textures, can combine to undermine the sense of harmony in your image.
So when you find smaller scenes too overwhelming, do what you can to simplify them. Focus on key details, isolate defining features—and obscure others.
You might simplify a woodland scene by highlighting shapely branches while excluding the undergrowth. Or for rocky terrain, you might switch to a telephoto lens to fill the frame with a few striking rock patterns.
A simplified frame of ghost gum trunks contrasting against the red rock of Karijini National Park, Western Australia.
To help create order amongst the complexity, here are some examples of what you might focus on in different settings:
Forests: Compressed trunk columns or fractal branches spreading out
Deserts: Sweeping lines and overlapping layers
Rivers: Long-exposure patterns as streams cascade down
Coastlines: Repeating pebble or stone textures
Lakes: Smooth ripples and reflected golden hour light
As mentioned, smaller and simpler scenes have formed some of my strongest compositions. By filling the frame with key details, you’ll walk away with a more personal photo to call your own.
3. Don’t stand still: Shift your position and angle
A sure-fire technique to help you notice and capture smaller scenes? Gain some height and then zoom in.
So look for natural features that can provide a higher elevation—such as a boulder, a fallen trunk or a hill. Or venture out to a lookout and use a tighter focal length to shoot down onto the landscape.
Sometimes even an extra foot or two in elevation will significantly alter the composition or enable you to exclude distracting sky patches. You’ll be better positioned to shoot across the scene (rather than up at it) and experience the landscape around you from a fresh perspective.
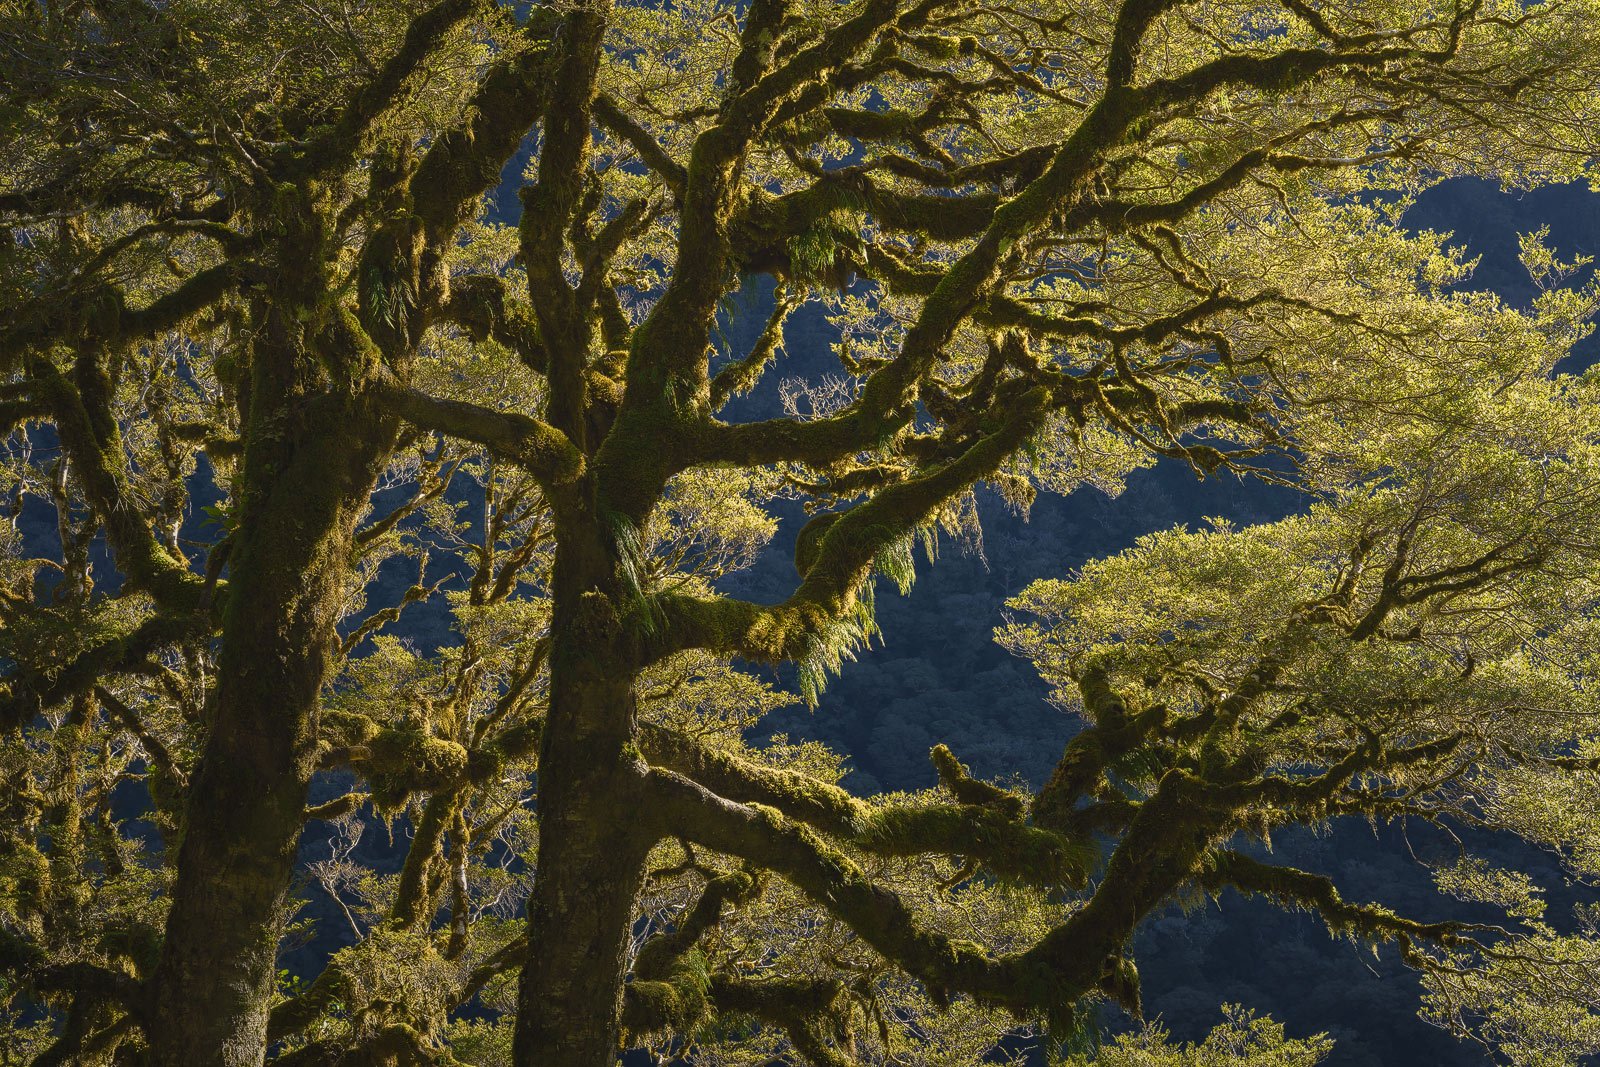
Similarly, once you’ve noticed a compelling formation, scout your surroundings to find the strongest angle. For example, I captured one of my favourite smaller scenes of a beech tree in Fiordland, New Zealand. Gaining height allowed me to position the branches in front of a distant mountain. So that when the sun fell, it illuminated the leaves against the valley shrouded in shadow.
After waiting for the afternoon sun to cloak a distant mountain in shade, it illuminated these shapely branches at Fiordland National Park, New Zealand.
When you’re on a well-worn track, you’ll likely only see a fraction of the potential frames on offer. So go explore and discover new angles to shoot from. But be careful—and considerate. If the area looks pristine or delicate, leave it that way. No photo is worth ruining the scene it was taken in.
One last benefit from a technical level: In some situations, gaining height may enable you to shoot perpendicularly onto the scene—rather than skim across it. This will reduce the necessary depth of field and help to minimise focus stacking. (Which can be tedious and is one of my least favourite parts of photography.)
4. Challenge yourself and make it fun
For many years, I struggled to break free from legacy ways of seeing the landscape.
So here’s one technique to help you capture smaller scenes: set a challenge for yourself. It’s counterintuitive, but introducing more ‘rules’ will force you into a different mindset and may allow you to view the landscape anew.
When you’re struggling to compose intimate landscapes, try a fresh approach. Here are a few rules that you may create for yourself:
Set restrictions: Work within a 20-minute timer or limit yourself to 10 frames
Go handheld: Leave the tripod behind and bump up the ISO if needed
Set a schedule: Take a photo every 5 minutes (great for daytime hikes)
Stick to a theme: Perhaps textures, colours, parallel lines or what’s underfoot
Remember: The purpose of the challenge isn’t to walk away with ideal images. It’s to get you to look at the landscape differently. To experiment without the paralysis of perfection.
Afterwards, go back through your images and take note of your favourite scenes. Often one or two (or more) frames will jump out and resonate with you.
The combination of low tide and an ever-shifting stream carved out these braiding sand patterns on sunset at Wilsons Promontory, Victoria.
Once you’ve settled on a frame with potential, consider how you might improve the image even further. Choosing a tighter crop? Placing the subject off-centre? Or returning under soft light?
After the challenge is over, then it’s time to revisit your favourite frames with your tripod to make the best image you can.
5. Document smaller scenes with your phone
With unfathomably powerful computers (and cameras) in our pockets, modern photographers live in an age of abundance.
So while our devices can be overwhelming and distracting (see tip #1), they also equip us with tools that past generations could only dream of. Like live cloud tracking. Detailed satellite maps. And a capable camera to take snapshots of promising compositions.
When I’m out exploring, I’ll often reach for my phone before I reach for my camera. The intentionality needed to set up a tripod, attach the right lens and dial in the settings is often a barrier to creation. (Which is why I enjoyed low-friction shooting with the handheld Fujifilm X100V so much.)
Beyond weather tracking and location planning, my phone serves as a core part of my photography workflow in two ways:
As a scrapbook of potential compositions. It’s particularly helpful when I spend multiple days exploring a new area. In the evenings, I’ll scroll through my snapshots and review the day’s scenes with fresh eyes. Then I can return to refine and strengthen standout scenes with my camera. The process also helps to prime my mind to look for similar but perhaps stronger compositions later in the trip.
To test telephoto focal lengths. Zoom in until you fill the screen with your preferred composition—even if that’s beyond the 3x or 5x lens—and take a snapshot. Then in my iPhone photo library, I can swipe up on the photo to inspect the precise focal length. This helps me determine what lens I’ll need and whether I’ll need to attach a teleconverter.
6. Sweat the small things: Miscellaneous tips
Here are some small—yet just as impactful—tips for compelling intimate landscapes:
Composition is still key: Even when there’s no sky, try to retain some breathing room around your subjects and carefully position elements to balance visual weight across the frame.
Experiment with light: If time permits, see what it’s like to capture the scene under different conditions. High-contrast scenes may look more flattering under soft light. While low-contrast scenes may benefit from harsh light.
Be mindful of what is (and isn’t) focus: When shooting close scenes, select a small aperture (such as f/16) and take at least five images—focused in the centre and in each corner—to help you focus stack the scene.
Fine-tune your frame for a clean view: Sometimes, shifting your camera by a few centimetres can evoke a much more pleasing sense of order in your scene.
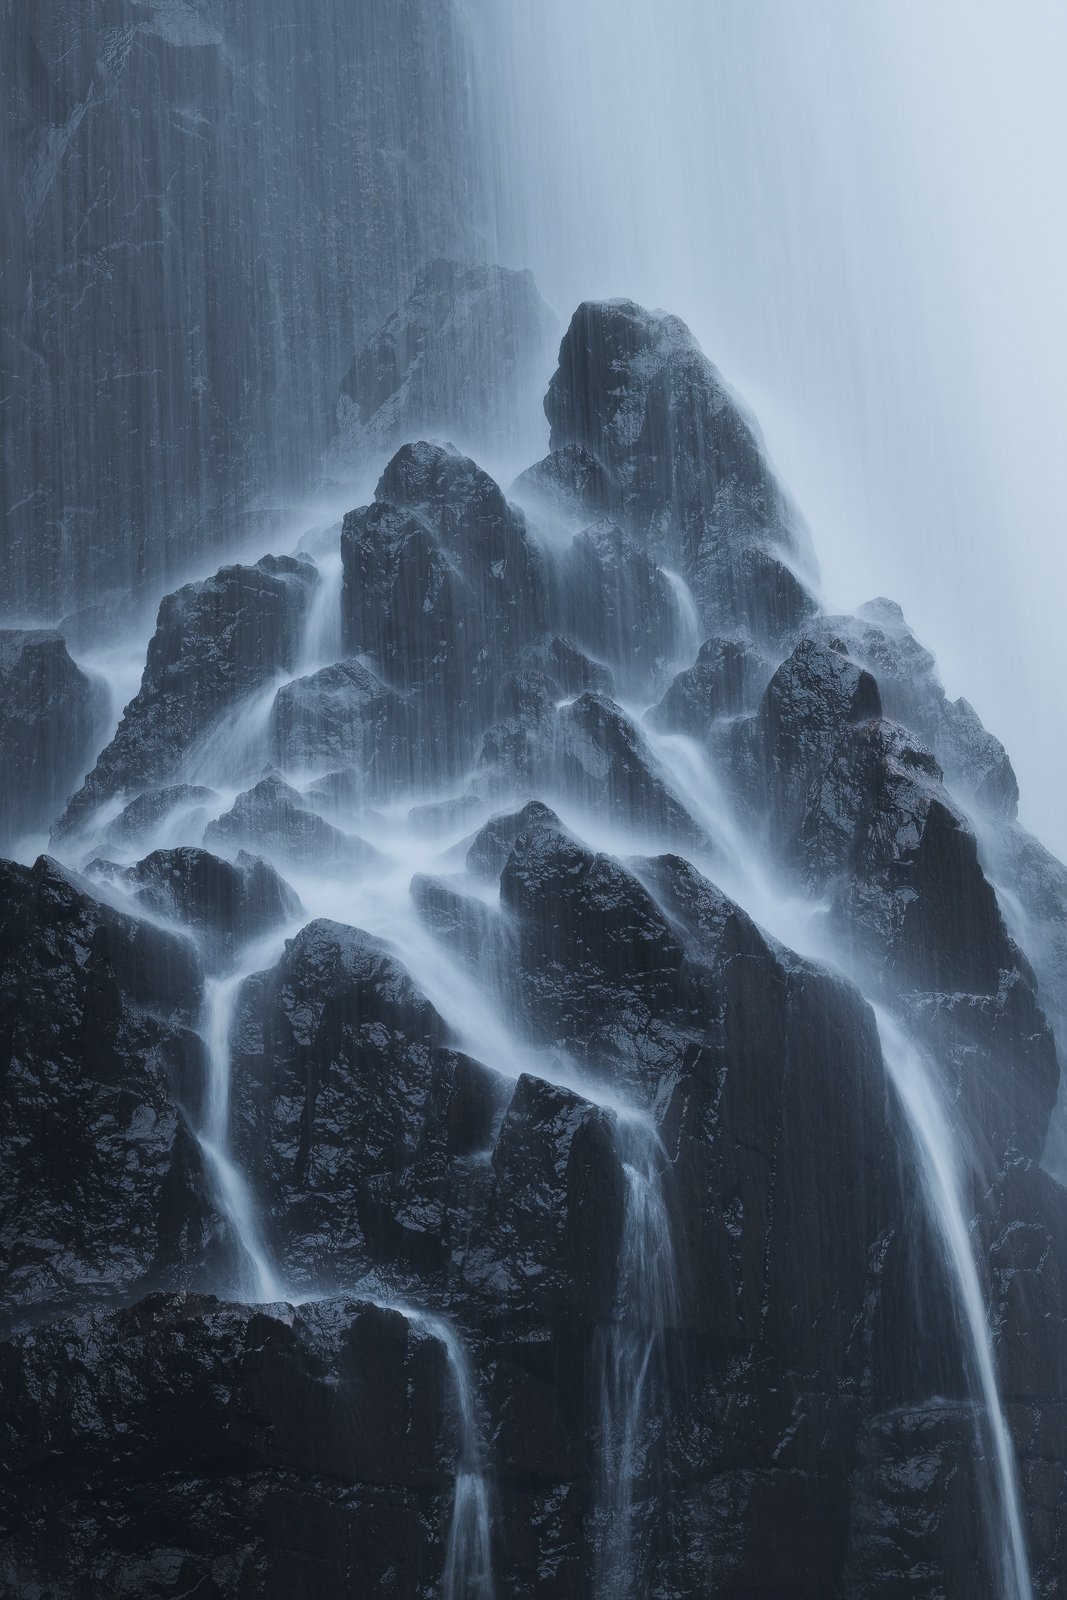
Rather than including everything (and potentially diluting the visual story), this tight detail captures the essence of a much larger cascade at MacKenzie Falls, Victoria.
Lastly, when it comes to smaller scenes and intimate landscapes, stop looking for perfection. You won’t find it and you’ll only set yourself up for disappointment.
Nature is complex, raw and unstructured. So as you capture skyless scenes, remember that not every image will be a portfolio-worthy shot. The point isn’t to produce perfection, but to capture scenes that resonate with you on a personal level.
When the sky isn’t the limit, you allow yourself the freedom to fail. To look for interesting—yet imperfect—scenes. To experiment with new angles, focus on fresh features and refine your approach to make more meaningful photos.


